
Free Fire Maps Guide 2026 – Strategies and Tips for Every Map
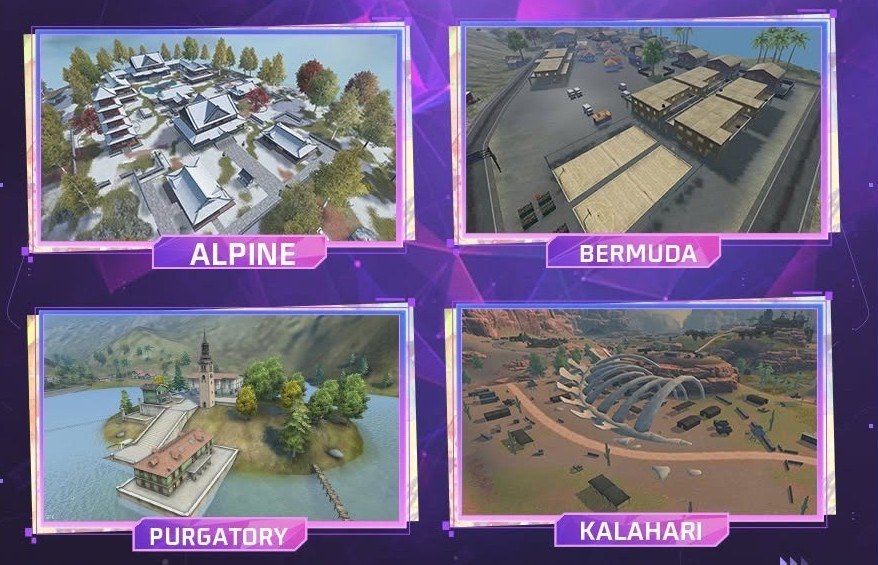

Free Fire maps can completely change how a match plays out. Terrain, building density, elevation, open spaces, and rotation routes all affect where fights happen and how safely you can move as the safe zone shrinks. Learning these differences is just as important as getting comfortable with your favorite weapons and characters.
There are seven maps covered in this 2026 Free Fire map guide: Bermuda, Bermuda 2.0, Kalahari, Purgatory, Alpine, NeXTerra, and Solara. In the lines and paragraphs below, we’ll focus on what makes each map different, some of their most notable points of interest, and practical strategies you can use when playing on them.
Bermuda

Bermuda is the classic Free Fire map and remains one of the easiest maps for understanding the fundamentals of Battle Royale. Its combination of settlements, open terrain, elevated positions, and connecting roads creates plenty of opportunities for both aggressive and cautious players. Notable locations include Clock Tower, Factory, Peak, Hangar, and Cape Town, but you don’t need to memorize every point of interest to play the map effectively.
The central areas tend to give you plenty of opportunities to encounter other players, while locations farther from the middle can provide more breathing room at the beginning of a match. If you choose an aggressive landing, prioritize grabbing a usable weapon immediately rather than spending too much time looking for your ideal loadout. Buildings and other structures become particularly important during early fights because they let you break an opponent’s line of sight.
Bermuda’s mixture of built-up and exposed areas also makes rotation important. Before leaving a settlement, check the terrain ahead and avoid running directly across large open spaces when another route provides cover. Gloo Walls can help when natural protection isn’t available. Elevated areas such as Peak can provide strong visibility, but occupying high ground is only useful if you keep track of opponents who may approach from different directions.
Because Bermuda supports close, medium, and long-range engagements, a flexible loadout works particularly well. More than anything, the map rewards awareness and good positioning, making it a useful place to practice the fundamentals that carry over to Free Fire’s other maps.
Bermuda 2.0

Bermuda 2.0 takes the foundation of Bermuda and changes parts of its environment with redesigned locations and more modern structures. Academy, Nurek Dam, Observatory, Samurai’s Garden, and The Circuit are some of its recognizable locations. Compared with the original map, these areas can introduce different sightlines and approaches to familiar Battle Royale situations.
Structures are particularly important here. Instead of charging directly toward an opponent, use walls, buildings, and differences in elevation to approach from a safer direction. Locations such as Academy can lead to fights around multiple structures, while Nurek Dam provides a very different environment where awareness of your surroundings and available cover matters.
Rotations should be planned before the safe zone forces you to move. If you’re in an outer location, check how much distance separates you from the next circle and begin moving before you’re forced into a predictable route. Players who wait until the last moment are much easier to intercept.
The biggest mistake is treating Bermuda 2.0 exactly like the original Bermuda. The fundamentals remain similar, but the redesigned areas create different angles and routes. Learn how the major structures connect and use that knowledge to reposition rather than relying only on mechanical skill.
Kalahari

Kalahari stands apart because of its desert setting, rugged terrain, and large differences in elevation. Refinery, Command Post, Council Hall, Bayfront, and Confinement are among its notable locations. The terrain often creates long sightlines, so positioning can become particularly important when moving between areas.
Weapons suited to medium and long-range combat can be very useful on Kalahari. When you have elevation, scan lower terrain before moving and look for opponents crossing exposed areas. However, high ground isn’t automatically safe. Remaining visible in the same position for too long can give other players time to line up their own shots or approach from another direction.
Movement across open ground deserves extra attention. Move between rocks, buildings, terrain features, and other available cover instead of choosing the shortest route every time. Keep Gloo Walls ready for situations where you unexpectedly take fire without nearby protection.
Kalahari rewards patience more than reckless movement. You don’t always need to chase an opponent across exposed terrain just because you’ve damaged them. Maintaining a favorable position can be more valuable than securing a single elimination and ending up vulnerable afterward.
Purgatory

Purgatory combines waterways, large stretches of land, settlements, and routes that can funnel players toward the same areas. Its current layout includes recognizable locations such as Central, Forge, Ski Lodge, Lumber Mill, Golf Course, Mt. Villa, and Moathouse.
Because water divides portions of the map, your route toward the next safe zone can matter as much as your landing position. Check the circle early and identify how you intend to reach it. Waiting too long can leave you moving through a predictable route while opponents are already positioned ahead of you.
Central areas can naturally put you closer to several possible rotations, but that convenience can also increase the likelihood of encounters. Outer locations may give you more time to prepare, though you’ll need to account for the additional travel distance if the circle shifts away from you.
When fighting around buildings, don’t focus entirely on the opponent directly ahead. Purgatory’s layout can allow other players to approach fights from connecting routes, turning a manageable engagement into a difficult one. Finish fights efficiently when possible, replenish your resources, and reconsider your position before another squad or player arrives.
Alpine

Alpine features a mixture of snowy terrain, developed areas, vegetation, and changes in elevation. Snowfall, Vantage, Railroad, River Mouth, Dock, and Fusion are some of the locations that define its current layout. These environments create a map where engagement distances can change quickly as you move between locations.
Vantage is a good example of why elevation matters on Alpine. High positions can provide better information about surrounding terrain and approaching opponents, but they can also make your position obvious. Use elevated ground to gather information and take favorable engagements rather than assuming you need to remain there indefinitely.
More developed areas favor close- and medium-range awareness. Check corners before entering structures and listen for nearby movement instead of sprinting blindly through buildings. Once you leave these areas, be prepared for longer sightlines and opponents watching from higher terrain.
Alpine rewards players who adapt their positioning as the environment changes. A weapon setup that gives you options at more than one distance can be useful, and Gloo Walls provide an additional safety option when the terrain leaves you without immediate cover.
NeXTerra

NeXTerra has a distinctly futuristic design and a dense collection of varied environments. Intellect Center, Twin Bridge, Museum, Mortar Ruins, Farmtopia, Zipway, Rust Town, Grav Labs, Deca Square, and Mud Site are among the locations spread across the map.
The variety of structures means you should pay close attention to sightlines when entering a new area. A route that appears safe from one direction may be exposed to another building or elevated position. Instead of immediately moving through the center of a location, take a moment to identify cover and possible enemy positions.
NeXTerra also rewards players who learn how its different areas connect. Efficient movement isn’t only about reaching the safe zone quickly. A slightly longer route with better cover can be safer than crossing directly through a heavily exposed or contested location.
When a fight becomes unfavorable, repositioning is often better than repeatedly peeking the same angle. Use the map’s structures and terrain to change where the opponent expects you to appear. NeXTerra can feel complicated at first, but understanding its major routes makes it considerably easier to navigate.
Solara

Solara is the newest map covered in this guide, bringing a port-city setting with a winding coastline and a slide track system running throughout the map. Its current locations include The Hub, Waterfall, Riders Club, Windmill, Archway, Funfair, Delta Isle, Bloomtown, TV Tower, Studio, Eco Drain, Casa Vista, Aquarium, and Bayside.
The map’s layout makes mobility and rotation particularly important. Roads wind between many of its locations, while coastal areas and changes in terrain can influence which direction is safest when moving toward the circle. The slide track system provides another traversal element to consider when planning how you’ll move around Solara.
Central locations such as The Hub place you within reach of several parts of the map, but occupying the middle isn’t always necessary. Locations closer to the coastline can provide alternative starting positions, provided you monitor the safe zone and leave enough time for your next rotation.
Avoid moving automatically just because a route appears convenient. Before leaving cover, check the surrounding terrain and consider where opponents from nearby locations are likely to travel. The same mobility options that help you move around Solara can also bring other players into your area.
Solara is ultimately a map where learning the connections between major areas pays off. Once you’re familiar with its roads, coastline, terrain, and slide track system, you’ll have more options for deciding when to fight and when to reposition.
Free Fire’s seven maps offer noticeably different Battle Royale experiences, so becoming comfortable with each one requires more than memorizing location names. Pay attention to terrain, cover, elevation, sightlines, and rotation routes, and adjust your approach according to where the match takes you.
For a more comfortable way to practice every map, you can play Free Fire on PC with BlueStacks. Playing with keyboard and mouse controls can make movement, aiming, inventory management, and longer play sessions more convenient, while a larger display gives you a clearer view of the battlefield.