Where Winds Meet Tian Ying Location and How to Beat Him

Tian Ying is one of the toughest campaign bosses in Where Winds Meet and acts as the hidden final test of the Qinghe storyline. This guide explains how to unlock his arena, where to find him, and how to handle each phase of the fight so you can clear the encounter consistently.
Where to Find Tian Ying
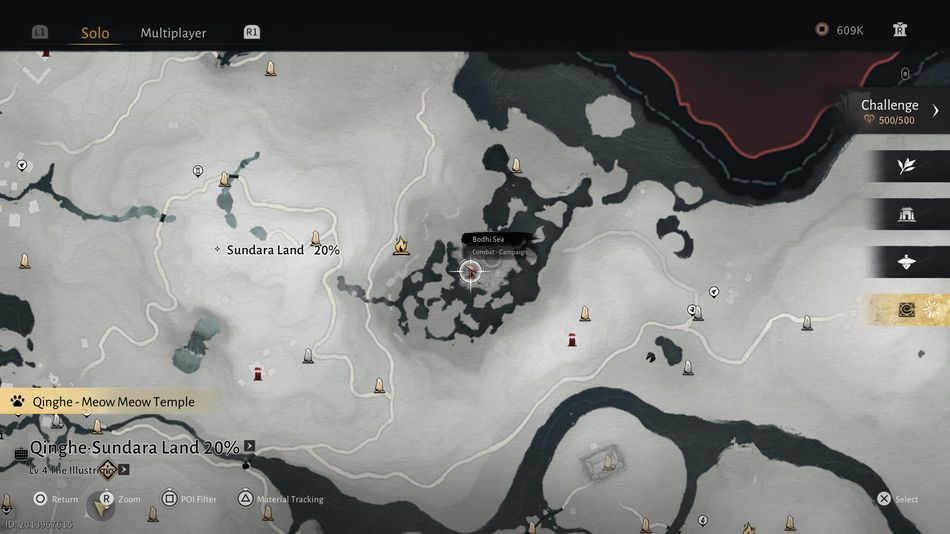
Tian Ying is a campaign boss tied closely to the Qinghe region and the Halo Peak story. You first face him during the Halo Peak campaign dungeon, and once the story conditions are met, you can then challenge him as a repeatable Campaign boss from the world map.
Players usually describe his location in two ways. Some refer to him as the secret final boss beneath the Buddha Light Pagoda at Halo Peak in Qinghe, while others refer to his Campaign boss marker at Sundara Land once his quest is complete. Both descriptions are correct because they point to the same character and fight, accessed through different interfaces.

How to Unlock Tian Ying
Before you can fight Tian Ying freely from the Campaign menu, you must progress far enough in Qinghe and complete the related quest chain. You will need around 6,000 Qinghe Exploration Points, or Area Exploration Level 6, which you earn by activating Boundary Stones, opening chests, and finishing quests and encounters across the region.
You also have to collect both pieces of the Buddha Light Jade. Buddha Light Jade Yin comes from the Bodhi Sea in northern Qinghe when you finish the Ye Wanshan campaign, while Buddha Light Jade Yang drops from the Palace of Annals campaign in southern Qinghe after defeating Lucky Seventeen. With both halves, you pass through Mercyheart toward Halo Peak, climb the Buddha Light Pagoda, place the Buddha Light Jade at the required time, and enter the underground dungeon that eventually leads to Tian Ying. Once he is defeated there for the first time, a Campaign boss icon appears at Sundara Land, and you can challenge him again by spending 20 Energy per run, with rewards that scale with your World Level.
Arena Layout and General Preparation
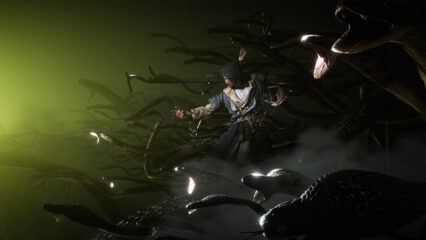
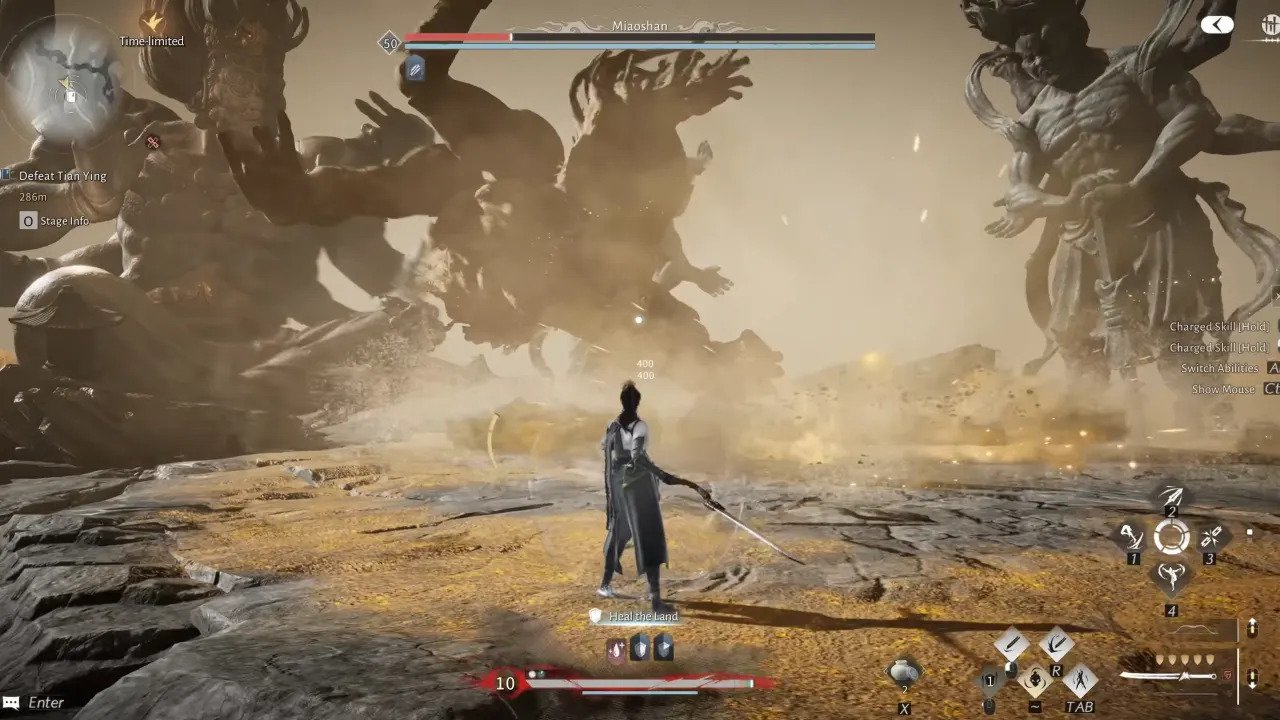
The fight against Tian Ying takes place in the Thousand Buddha Cavern beneath the Buddha Light Pagoda. The arena is circular, with a large Buddha statue dominating the center and environmental hazards that become more relevant in later phases.
It is helpful to bring a weapon you are already comfortable deflecting with, since several of Tian Ying’s most dangerous moves are balanced around tight parry timing. A solid ranged option can also help you reposition or chip away during openings in phase two, when the Sand Golem and statue add more pressure at close range. You should upgrade your defensive skills and practice Perfect Deflect timing for red attacks such as Asura Rush, and aim to go into the fight with gear and levels that match the final content tier of Qinghe.
Moves and Phase Structure
Tian Ying’s battle is split into three phases, each with a different rhythm and emphasis. Across the entire fight he uses staff based golden attacks, sand infused abilities, and fast assassin-style rushes that punish late reactions.
The most important moves to recognise are:
- Gold Slash, which sends a long-range golden wave forward from his staff.
- Sandstorm and Divine Punishment, where the Sand Golem bombards the arena with projectiles and slams.
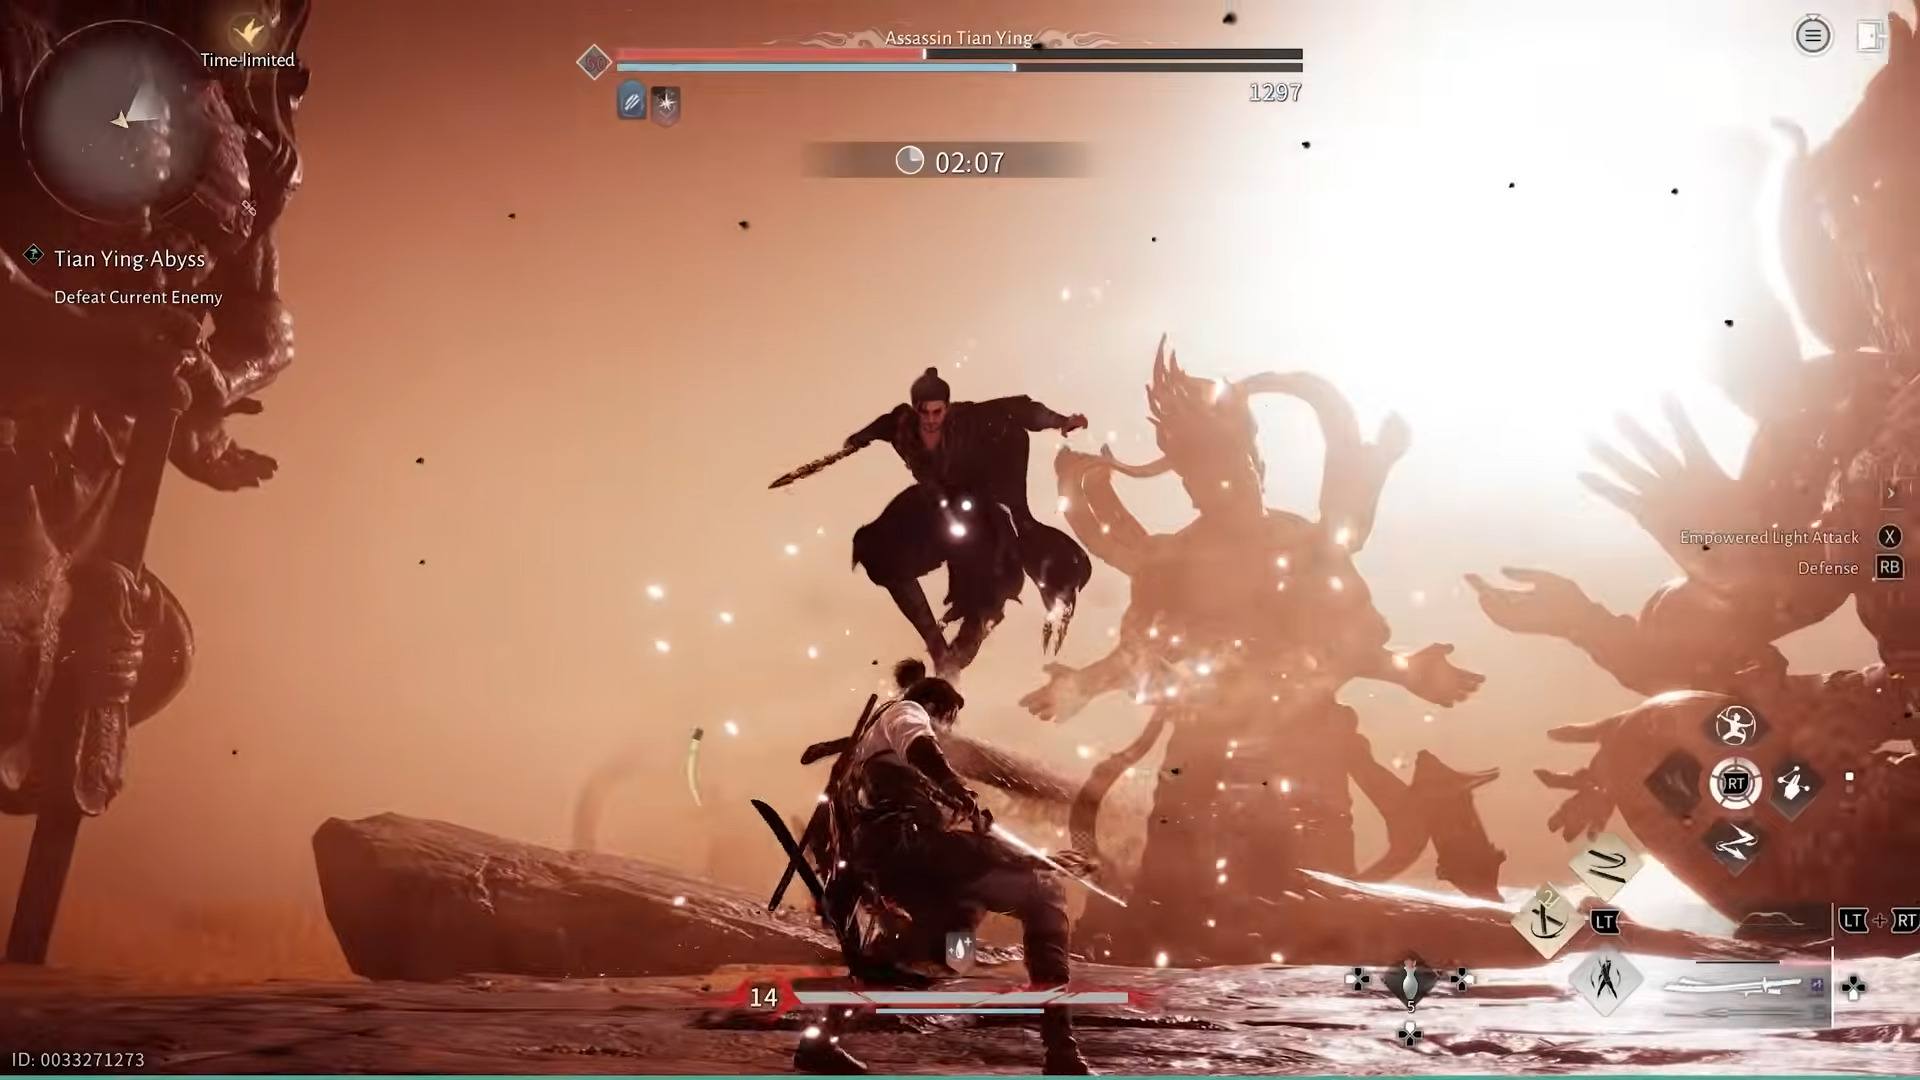
- Asura Rush, a red grab style charge that leads into repeated Sand Golem slams if it connects.
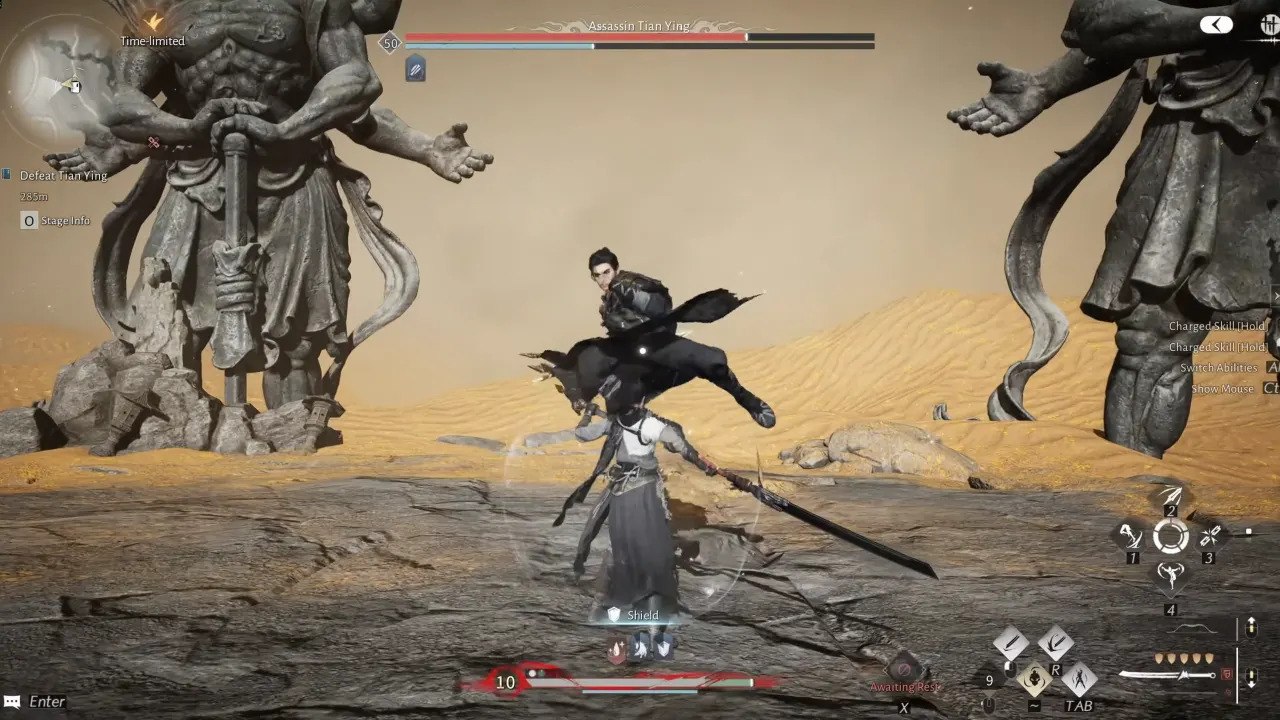
- Sand Clones and Ambush, where three clones chase you while the real Tian Ying appears from blind spots to strike.
Every major combo has a clear wind-up animation, so success depends more on reading these cues than on raw stats.
Phase 1: Staff and Golden Energy
Phase one focuses on Tian Ying’s staff and golden power, making it the simplest and most grounded portion of the fight. He uses Gold Slash as a line attack from long range, then chains into Golden Swings, longer War Staff combos, and Golden Dance, which is a spinning sequence that ends in a ground shockwave.
The safest approach is to stay at mid-range and step in only when you see a familiar staff string begin. Deflecting his staff attacks steadily drains his Qi and creates short punish windows where you can land controlled damage. Keeping your own combos short is important, since lingering in melee too long can cause you to eat a new string before you are ready. Once you feel comfortable with phase one deflects, you will have a solid base for the faster patterns in phases two and three.
Phase 2: Sand Golem and Martial Arts
Phase two begins when Tian Ying summons his Sand Golem and starts layering sand-based attacks with more advanced martial arts. Sandstorm sends sand projectiles and overhead slams through the arena, while Divine Punishment chains multiple Sand Golem punches with a closing axe kick. He also adds Assassin Sting, which is a jab into spinning elbow and heavy strike sequence, Tornado Kicks that advance in spinning arcs, and Golden Flurry, where he dashes with a spinning kick and ends in uppercut and heavy punch finishers.
During this phase, it helps to circle him at mid to long range rather than retreat directly. Moving around him lets you bait out Sandstorm and Divine Punishment and then step sideways into safer lanes, avoiding most of the sand coverage. Assassin Sting and Tornado Kicks are both long multi-hit chains; once you have seen them several times, they become excellent opportunities to drain his Qi because deflecting each hit builds large stagger. The move you should watch most carefully is Asura Rush. When he glows red and charges, a Perfect Deflect rewards you with a huge opening, while a missed timing can result in a devastating Sand Golem grab sequence.
Phase 3: Clones and Ambush Patterns
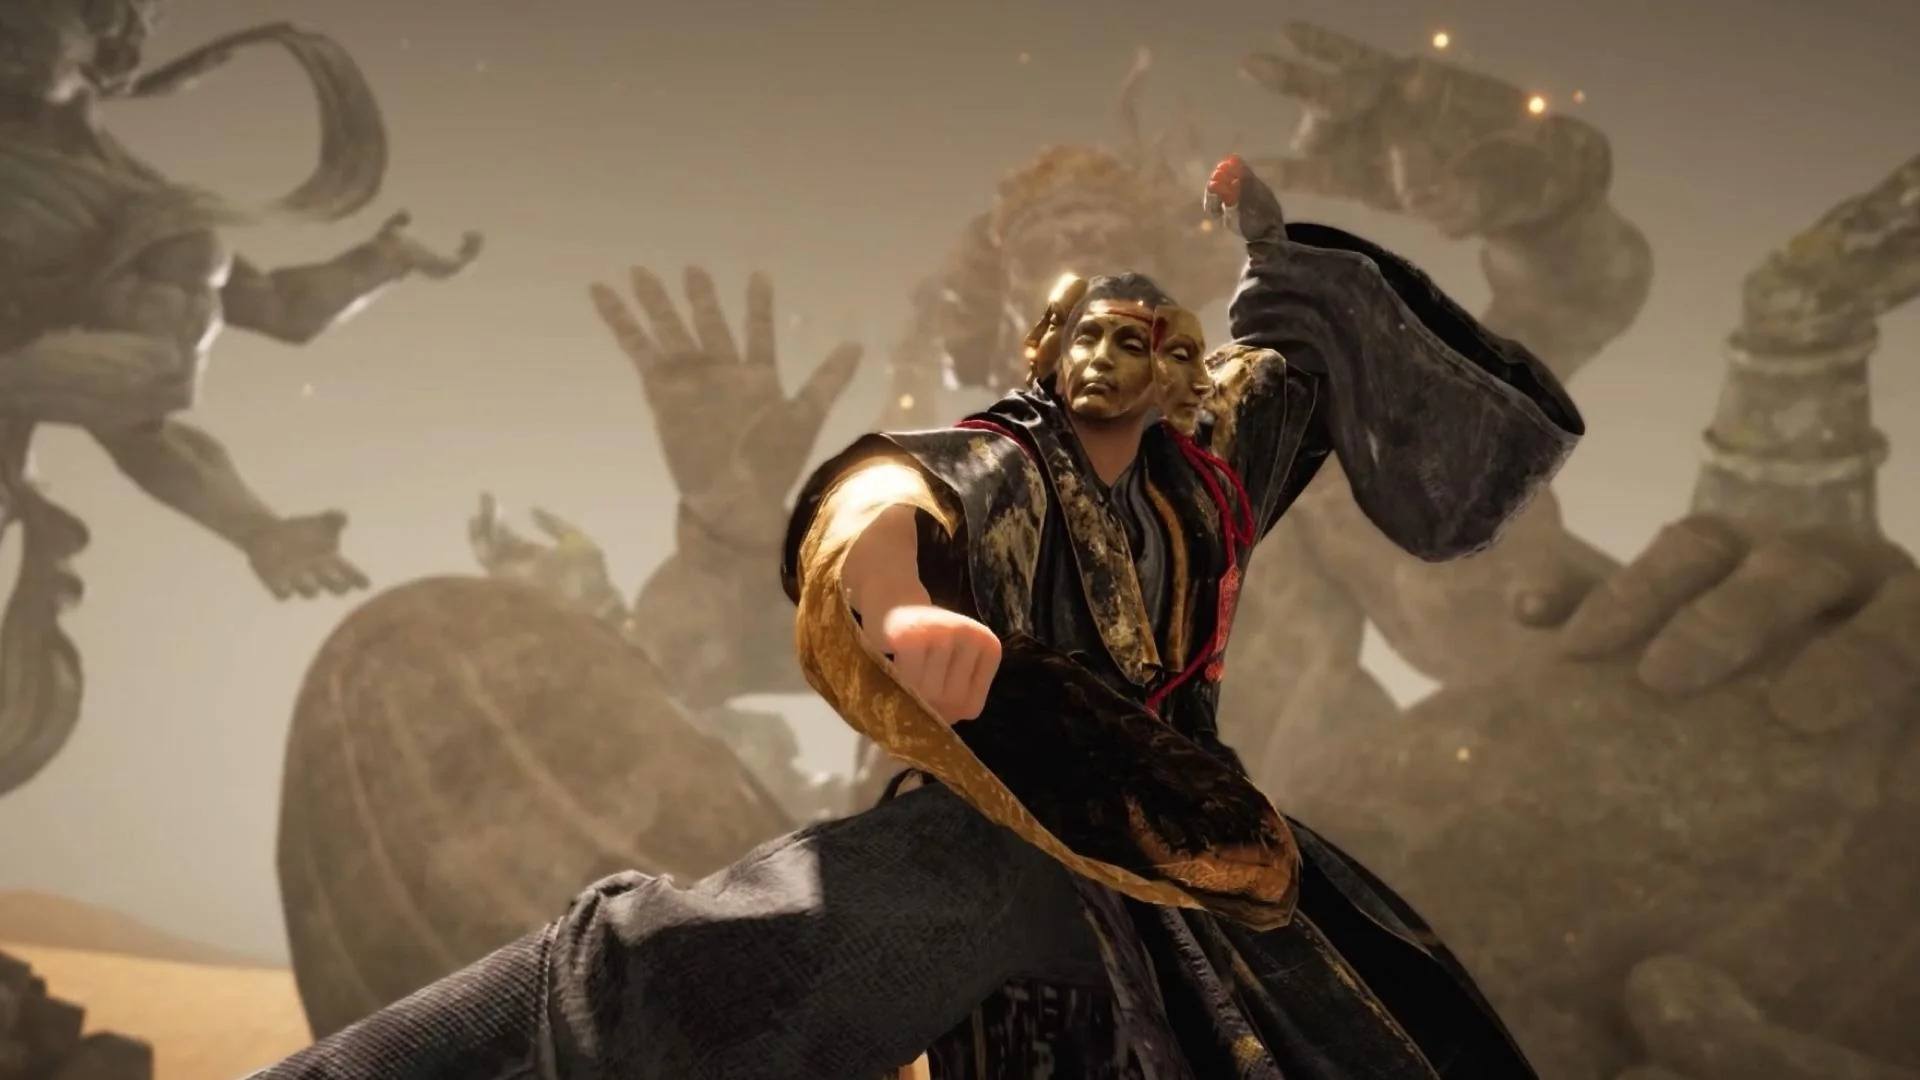
The final phase is Tian Ying at his fastest and most unpredictable, using clones and ambushes to attack from blind spots. When he hovers and summons three sand clones in a triangle, he disappears from immediate view, and the clones begin to chase you around the arena. While they advance, the real Tian Ying reappears at different angles, using moves such as Shadow Dance, Ambush, Assassin-style rushes, and Sand Rush, which involve repeated charges from alternating directions.
The safest tactic is to ignore the clones and focus on identifying the real Tian Ying. Each time you successfully deflect one of his ambush attacks, one of the clones disappears, so solid defence quickly cleans up the arena. Keeping some distance gives you space to react when he vanishes, then you can sidestep or attempt a deflect as soon as he reappears. It helps to treat this phase as a pattern recognition test rather than a raw damage race: prioritise clean deflects and survival, then counterattack only during obvious stagger windows.
Recommended Builds and Playstyle
Tian Ying heavily punishes reckless aggression, so balanced builds generally perform better than pure damage setups. You do not need a specific weapon to defeat him, but it is important to use something whose deflect timing you know well, such as a familiar sword or blade with clearly readable animations.
Mystic Skills that offer brief invulnerability, fast repositioning, or extra safety for parry timing are particularly helpful in phases two and three. It is wise to expand your mastery in stages: first, focus on timing deflects for phase one staff strings; next, practice handling one or two tricky phase two attacks, such as Assassin Sting or Asura Rush; finally, work on reading his movement and afterimages in phase three so that Ambush and Sand Rush become less surprising. With patience and a defensive mindset, Tian Ying becomes a fair test of your timing rather than an impossible wall, and defeating him not only completes a major Qinghe story arc but also unlocks his Campaign boss version for repeated farming.
Tian Ying’s fight rewards careful study of his patterns and disciplined defence. Once you have internalised his staff rhythms, sand combos, and clone ambushes, you can approach the encounter with confidence and claim both the story payoff and repeatable Campaign rewards that follow his defeat. For the best gaming experience, play Where Winds Meet on BlueStacks!